Friday, September 30, 2011

Challenge 66 - Inspired by Janelle

Well...look at me! Two posts in one day!! If you'd like to take a peek at my Zentangle inspired art...scroll on down to the previous post!

This week the challenge from Susan at Simplicity is to visit Janelle blog and create a card that's inspired from something found there.  I found a beautiful card (here) that was several layers and adapted it to a one layer card.  I love the use of the doily and the colors Janelle used.  If you've never visited Janelle's blog, you should take a moment to do so, especially if you're feeling down and need an uplifting boost to your spirits. Janelle is going through some tough times right now, but her faith keeps her strong. Our thoughts and prayers are with you Janelle while you continue this journey in uncharted territories!


As you can see, I didn't exactly follow the colors on this first card...I got distracted and picked up the wrong pen (green rather than blue)....and once started I had to finish it. The "doily" is a new Flourishes stamp, and the cupcake is Hero Arts, I think.  The sentiment is also a Flourishes stamp.


So....I decided to give it one more try.  I used the pink and blue this time...and I love how this turned out.  Thanks for the inspiration, Janelle!

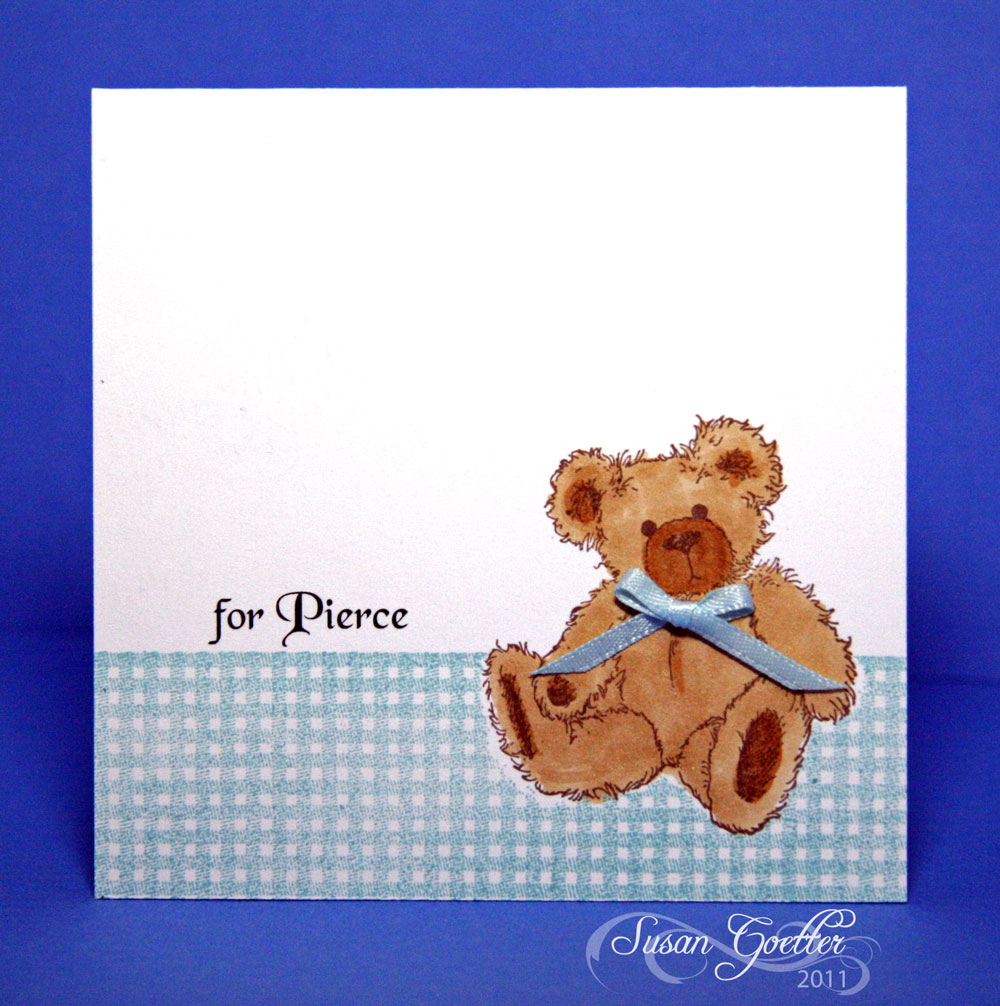
Thanks so much for popping by....I appreciate all your lovely comments!! Until next time...

♥ Hugs! ♥


Pin It!

Challenge 41 - Duo Tangles

This week's challenge from Laura at I am the Diva blogspot is to do a tile or Zentangle inspired piece that uses only these two tangles; Jonqal and Opus. These are official Zentangle patterns...neither of which I've ever practiced. So...it's about the process...really.  Can't say that I'm overly thrilled with how these two piece turned out, but I definitely have a better comfort level with these tangles.  


This is actually the first tangle I drew.  I used a 4x4 tile..no string to start me with.  I just started with the center swirl which is called Opus.  Then I added Jonqal around it.  


This was my second attempt at the two different tangles. This is a 4 x 4 tile also.  I basically did the same thing here....first I put in the Opus tangle, then added the Jonqal inside it.  I do like this one the best. 

What about you?  Which is your favorite?

Thanks so much for stopping by!! I truly appreciate all your fabulous comments! Until next time...

♥ Hugs! ♥


Pin It!

Saturday, September 24, 2011

Less is More 34 - A sketch

This week the challenge at Less is More is to use the following sketch to create a card.  Last week was a busy week for the challenge with 782 cards submitted for the challenge! We might not have reach 1000 cards as we were striving to do, but WOW...that's a lot of cards!  Here's the sketch we're to use this week:


Here's my cards (yes I made 4 different cards, and I would have more, but unfortunately a few of my cards ended up in the circular file, if you know what I mean).


For this first card, I used a Flourishes stamp.  I trimmed the image to approximately 2.25 x 2.25 inches and round two opposing corners.  I layered it on a piece of red.  I colored the image with Copics.  The tiny little hummingbird is from the same Flourishes collection. He was also colored with Copics and hand cut so that I could pop dot him over the flower.  The sentiment is from another Flourishes collection.

I like how this second card turned out.  The little snowman is an Inkadinkado stamp. I stamped the image in Memento black and colored him with Copics. I added a little grey highlights and then added some stickles for the snow drifts and snowflakes.  I cut the image out with a Spellbinder die and pop dotted it on a red background.  The sentiment is from PTI and was stamped with Versamark ink and embossed with white detail embossing powder. (I actually did a decent job with the embossing on this! LOL!)


I think this card might be my favorite of the four.  I recently purchased this fall collection.  It is a TPC Studio Collection.  I did a little masking with this.  I stamped the pumpkin, then masked it and stamped the sunflowers behind it.  After coloring the images with Copics, I sponged in some sky and a little ground. The sentiment is from PTI.

This card has several layers.  I embossed the circles on white, layered it on the blue. Stamped the image (Flourishes) on another piece of white and colored it with Copics.  I cut the shape out with a Spellbinder die, then added two mats (blue and gold) and hand cut the mats.  The banner sentiment is also a Flourishes stamp that I stamped and then cut with a Spellbinder die and added the blue and gold mats to it also.

Thought I'd share another layout with you too.


Photos of my grandchildren, Katie, Adam, and Maggie, playing at Pensacola Beach in April 2011. I used Bella Blvd Papers for this layout. The scalloped edge was hand cut, then I added a darker pink background layer. The clouds were cut from paper in the same Bella collection. I added some faux stitched corners and some faux stitching to the border strips. The photos are backed with a teal card stock. The robin's egg bling that was added to the scallops was colored with Copic markers. I also added a few "water" droplets with Robin's Egg bling. Tags are all Bella Blvd. Simple...quick. I seem to be doing a lot of simple and quick lately! LOL! (The black border was added in photoshop to make the edges of the layout show up when posted)

That's all for today.  Thanks so much for stopping by!! A BIG THANK YOU to all of you who came by my blog numerous times last week....I appreciate your comments!!  Until next time...

♥ Hugs! ♥


Pin It!

Thursday, September 22, 2011

OLW65 - Sentiment-a-mania and a little more "Less is More"

It's time to play with the One Layer Wednesday challenge, hosted this week by Jennifer Styles at Styles Ink.  The challenge this week is to make a card where the sentiment is either the focus of the card or shares the focus equally with the image.  I purchased this stamp from Flourishes last year and couldn't seem to use it for a card, even though I think it's a beautiful stamp.


So, this is my first try...I stamped the image using Versamark and then used sparkly gold embossing powder and heat set it.  Not my favorite look...(mostly because I'm still not a very good embosser!)

I decided I don't really like the gold embossing, so I decided to try it in red.  Same process...still not happy with the outcome.
So...one more time....This time I stamped it in Memento black and colored it with Memento markers and a gold embossing pen.  After the gold dried, I added a layer of sparkle over the gold using my Sakura clear star pen.  The berries on this were done with liquid pearls.


So, I finally gave up on the Rejoice stamp and decided to try something different.  This sentiment is from Paper Smooches.  I stamped in Memento Bamboo Leaves.  The pine cone and pine bough were also stamped in the Memento Bamboo Leaves, then I colored the pine cone with two different brown Copic markers.  I like this one! Super simple...AND it fits the challenge! YAY me!!!

I'm also submitting these cards for the Less is More challenge this week, since Chrissie and Mandi are trying to have 1000 cards submitted. Unfortunately, I'm putting them all in one post, so I won't be helping the count much! Sorry ladies!

I have another layout to share with you.  This is a photo of me when I was about 3 years old.  

I used Scribble Scrabble Naomi's Collection for this layout. The edges of the background piece were punched with a MS around the edge (deep edge) punch. I cut one mat from the yellow and rounded the corners, then added a bit of faux stitching. The pink swirly mat was punched with a MS around the edge punch and backed with a piece of green card stock. The photo was also matted with the green card stock. The flowers were made using punches, inking and doodling and a piece of pink bling was added to the centers. I punched quite a few butterflies with a MS punch that has 3 butterflies on it...so there are some tiny butterflies. I also added a chipboard leaf behind the flowers and a button shoe. The chipboard swirls on the pink gingham paper were painted with pink and then I added a touch of glitter to them. Title letters are BG. I also added liquid pearls to each of the flowers in the outside border, except for the large flowers...and I added pearl centers to those flowers. Each butterfly has a bling body or s touch of liquid pearls. Journaling is tucked behind the swirly mat and the top swirl is the pull for the journaling. Journaling reads:

Looking at this photo today, makes me realize how quickly life passes. I must have been about 3 years old in this photo. The dress I'm wearing looks like one of the dresses my mama made for me from flour sacks. The little girl you see in this photo was quiet and shy. She had two big brothers that she would follow anywhere. This little girl believed in Santa Claus, the tooth fairy, and that all people were good. She lived in the country, and loved playing outside with her brothers. She went barefooted all summer and loved to splash and play in the mud puddles after it rained. This little girl thoroughly enjoyed her childhood. Times were simpler then… less busy and less stressful. People who know me now would never believe that I was a quiet and shy little girl…but I remember when…. 

Long post.....if you made it all the way through...Thank You! 

Thanks so much for stopping by! I truly appreciate your comment...each and every one!!  Until next time....

♥ Hugs! ♥


Pin It!

Tuesday, September 20, 2011

A Little More Art?

Thought I'd shared an new piece of "art" I've attempted.  This time, I'm also sharing the photo I used to sketch from.  This is my granddaughter, Katie...well, at least the photo is of Katie, the sketch is my attempt to sketch Katie from the photo.   Here's the photo I used:

And here's my sketch from the photo.  Still a lot of things I need to work on. Can you see any resemblance to the photo?  I'm afraid I didn't do it justice.


Also sharing another piece of my Zentangle Inspired Art.  I did this while watching television the other night.  Still haven't mastered the perfectly round look, but I'll get there! LOL!


Thanks so much for stopping by!  Please leave me a comment and give me your take on my sketching....should I pursue sketching?  Your comments as always, are greatly appreciated.


Until next time...

♥ Hugs! ♥


Pin It!

Monday, September 19, 2011

Challenge #40 - Pinwheels for Peace - ZIA

It's Monday, and time once again for the challenge from I am the Diva.  Laura has challenged us this week to participate in Pinwheels for Peace which was originally started as an art installation organized by two high school teachers in Florida.  They used the project as a way to teach kids how to express their feelings about the world and what's going on in it.  Since then, it's grown from 500,000 pinwheels the first year to 3.5 million last year!!

So, this week's challenge is to create your own pinwheel for peace.

To create my string for my pinwheel, I made a pinwheel from paper and traced around it.


The finished size of this is 5x5 inches.  I know most people tangle on the 3.5 inch tiles, but I definitely do better with a larger size tile.

Thanks for stopping by! Your comments are greatly appreciated!  Until next time....

♥Hugs!♥


Pin It!

Sunday, September 18, 2011

LIM33 - Anything Goes - Again

I hadn't planned on posting additional cards for the Less is More challenge this week, but I finished these cards today and wanted to share them.  I can't however bring myself to make two separate posts...sorry Chrissie and Mandi.

These cards are for our new grandson (Pierce) who will be arriving on October 21.  He might be our 17th grandchild, but the anticipation of his arrival is just as great as it was for the first 16.  There's nothing sweeter than a precious little one!  My daughter in law will be having two different baby showers, so I needed two cards (I was thinking of asking her to just give me one card back and I'd give it to her twice, but my  daughter told me that was tacky! LOL!).  So that's why there are two baby cards for Pierce.


These cards are both 4x4 inch cards.  For this first card, I stamped the bear (a very old PSX stamp from my stash), then cut out a mask to cover him so that I could stamp the gingham background.  The background stamp is a Papertrey Ink stamp.  After stamping the bear and the background, I printed the sentiment on the card...rather risky, but it worked out fine for both cards. I colored the bear with Copics and added a tiny blue bow.


This second card is also 4x4 inches. The sentiment is computer generated.  I stamped the giraffe after printing the sentiment, then stamped him again on card stock, colored him with Copics and cut him out and popped him over the stamped image.  The doodled lines were to cover up a boo-boo, but I think it turned out okay with the doodled lines.

This card is also for the One Layer Wednesday challenge from Susan at Simplicity. Our challenge is to COLOR IT! Stamp an outline image and color it using any coloring medium you want: colored pencils, watercolor pencils, watercolor crayons, paint, Copics, Bics, Sharpies, markers of any kind, or your kid's box of Crayola crayons. Doesn't matter...just COLOR IT!  Well, I colored the little giraffe (I hope the fact that he's pop dotted doesn't disqualify this card as a one layer card!)

Thanks so much for stopping by!  If you've already visited the first post, and you've come back again...bless you...and Thank You for your visit and for all your fabulous comments!  Until next time....

♥ Hugs! ♥


Pin It!

Saturday, September 17, 2011

Challenge 39 - All You Need is Love

We were challenged by I am the Diva to create a tangle about love...them importance of Love in the world today.  We're doing this in memory of all those who were touched by the tragedy of 9/11.  Laura (I am the Diva) says it best:

And in the darkness of all that hatred, we did find love.  We saw it in the brave and heroic men and women who first responded to the scene, we saw it in those who reached out, those who held perfect strangers hands, we saw it in the act of rebuilding....  Love is the ultimate force in the Universe.  Love heals, love gives us hope, love endures...Love conquers all.      

So I've created a few tangles...two of them have the word "love" inside the tangle and the last one was made with love...so here they are....


All of these tangles were drawn on a sketch pad that I keep by my chair and I tangle while watching television in the evenings.  

I do love how this heart turned out...sweet~

 This was just something I've been wanted to try. I still have difficult keeping things "even" and not having my circle looked warped.

Thanks so much for stopping by! I appreciate your comments!  Until next time.....

♥ Hugs! ♥


Pin It!

LIM33 - Anything Goes

The challenge this week at Less is More, is to create  a clean and simple card...and anything goes. This week, Chrissie and Mandi are looking for 1000 cards to be entered....here's my contribution of 5 of those cards.  I will post them individually, but this way, for those of you wonderful folks who want to leave a comment...you only need do it one time! I do appreciate your visit and as always, I love reading your wonderful comments!

 Since I've not made a start on my Christmas cards yet, I thought that I'd get a few of them done today. This first card was something new I was trying.  I cut an oval out of the card front using a Spellbinder die.  The ornament was cut out twice (also a Spellbinder die) and I colored the top piece, added some small pearls, a little glitter, and some gold leafing  around the edges.  I sandwiched a thin gold cord between the two layers of the ornament and attached it to the inside of my card.  I also cut a "liner" for the inside to cover up the cord. It's best to cut the liner out of thinner card stock at the same time you cut the card front. If you do that, it's easier to line the two pieces up (ask me how I know).  I stamped a branch and the sentiment with stamps from PTI.  I also edged the oval with some of the gold leafing pen.  I lined the inside of the card with some green and stamped the sentiment low on the bottom of the card.  Not a difficult card, but a bit time consuming. Maybe if I made another one it wouldn't seem so difficult.

This second card was super quick to make.  I embossed the white background with an embossing folder, backed it with a piece of red card stock, wrapped some gold cord around the card and then added a K&Co chipboard sentiment with pop dots.  Super simple and quick...and I really like how it turned out. Definitely will need to make a few more like this.

The third card I made is absolutely gorgeous in real life.  I used some satin textured paper and embossed this Christmas tree on it. Then I covered all the embossing with glitter.  I backed the embossed piece with some red card stock and added a ribbon at the base of the tree.  Quick, easy...and just beautiful!  If you click on it you can see it bigger and see the glitter and shine.

These last two cards are just quick and easy. I love this format and use it often when making cards for Christmas, especially those that will be mailed and don't need a lot of bulk.  I used a holly stamp that I've had forever and stamped in grey. The image is colored with Copics and the sentiment is stamped in red and is a Papertrey Ink stamp.

I almost didn't post this one, but decided to go ahead and post it.  I love these little carolers.  They make me smile.  I stamped in Memento black and colored with Copics.  The sentiment is PTI.  To draw the border, I simply use my TH zero center ruler and just draw all the borders at 1/2 inch.

These are all my submissions for the LIM challenge this week. I sincerely appreciate your comments! Thanks so much for stopping by! Until next time...

♥ Hugs! ♥


Pin It!

Sunday, September 11, 2011

Challenge 38 - Pair of Ducks (or Paradox)

I've missed a couple of weeks playing in the challenge at I am the Diva blog. The challenge this week was to draw a tile using the tangle, Paradox.  This tangle takes a little practice...at least it did for me.  I believe I've done about 4-5 pieces this week while practicing.  Here's my take:
 The finished size is about 6 x 6 as I was drawing in my sketch pad and it just got a little bigger than I'd planned. I started out by drawing an octagon shape and then dividing it into triangles.  I love how this one turned out!

Thanks for stopping by!! I appreciate your comments!   Until next time....

♥ Hugs! ♥


Pin It!

LIM32 - Seeing Double

I've missed playing in the Less is More challenge for a couple of weeks.  It's been a busy two weeks for me. As some of you might remember from a previous post, my mother (who is 86) fell and broke her hip and had hip replacement surgery.  She's now in a rehab facility and is working hard to get her strength back so that she can go back home. It will probably be 6 weeks or more before they let her go home, but she's very determined to make it.  The doctors don't really want her to go back home alone, but that's what she wants, and we're determined to try and make it happen for her.

After returning from the 6 hour trip to check on my mother, my hubby and I took a little vacation to the beach at Sanibel Island which is about 9 hours in the opposite direction...WHEW!  So...it's been more than two weeks since I've done any stamping, card making, or scrapbooking...so my mojo has flown the coop!

Anyway....I digress, I wanted to tell you about the card I created for this week's Less is More challenge, where we've been challenged to create a one layer card using one image twice.  Did I mention that my mojo is still on holiday?...this is all I could come up with for this week's challenge.  Maybe my brain will kick into gear next week! LOL!

This finished size of this card is approximately 4.5 x 6 inches.  I cut a piece of white card stock 6 x 9 inches, then scored it 2.25 inches from each end to make my "doors".  Then, I cut a small 1.5 inch square and used the negative space as an embossing template with my light box, to score the three panels on each door.  I used a Copic marker to add shading to each panel and stamped a wreath in the top panel of each door.  The wreaths were stamped with Memento Bamboo Leaves, then colored with various markers.  I added a gold brad on each door for the "door knob".

 Here's a peek at the inside of the card when you open the "doors".  I stamped a tree (I believe it's a SU stamp).  Then I added a few baubles with red stickles.  The sentiments are both from Papertrey Ink.

Thought I also share another layout I did a few weeks ago.  These are my granddaughters, Camilah and Natalie.  


For this layout, I used Echo Park Splash collection. I love the bright colors in this collection. I made the kite by cutting a diamond shape and paper piecing for triangles for the kite, leaving a small red border for the crosspieces. The tail of the kite was cut with an craft knife then I tied tiny ribbon knots and adhered them to the kite tail. The circle embellies were punched circles from one of the papers and then I cut out the octagons and pop-dotted them on the circles. I added a bit of doodling to each circle and octagon. The large title letters are some old chipboard from my stash and the small letters are Basic Grey. I used two different punches for this layout - the loopy edge and the scallop with dots - both MS punches. The date was computer generated and I inked the edges with pink. The quote is a Hero Arts stamp - stamped in black Memento ink and then I inked the edges with pink. I added 3 dimensional dots in orange to the title letters and across the bottom between the circles and some teal dots to the kite. Journaling is tucked behind the top of the photo and reads: 

Camilah and Natalie, you two have grown up so fast and you are both beautiful young ladies. It’s so nice to know that you’re friends. You are also beautiful, sweet, kind, talented, and incredibly smart. We are truly blessed to have such wonderful granddaughters. 

Thanks so much for stopping by! I truly appreciate all your fabulous comments! Until next time...

♥ Hugs! ♥


Pin It!

Friday, September 2, 2011

Second Post today....

~Gasp~....two posts in one day!  I've not been sitting around doing nothing.  For some reason, I decided to try my hand at sketching.  These are a few of the sketches I've done in the past week...definitely NOT professional art by a long stretch, but I amazed myself. I've never been able to draw much more than a stick figure...and now I've drawn something that actually looks like a person!! I did watch a few "how to" videos on YouTube....how to draw an eye, etc. For drawing, I used a regular #2 pencil and (did some shading) blended some of the lines with a blending stump.

First drawing

Second drawing

Third drawing
I will always be my own worse critic, I know.  Although these are definitely more than stick figures, they still didn't turn out real enough for me.  The first two, I was just drawing....no one specific in mind.  The third drawing was done by looking at a photo of my niece, Sarah.  While it does resemble her (slightly), it still isn't "right".  For some reason, I always get the eyes too big...face too fat...and nose a little crooked!! LOL! Isn't there a saying about "practice makes perfect"?  Guess I need some more practice!

Who knew?!  So...I might just pursue this a bit further and see if there's any real talent to be found. I did enjoy piddling with the drawings,

Okay...I think that's all from me today.  Gotta get busy and get something done around here!  Thanks a bunch for stopping by!  Comments or critiques definitely welcomed...just be kind to this "budding" artist! LOL!

Until next time....

♥ Hugs! ♥


Pin It!

Challenge Layout and MIA

It's been a while since I've posted anything.  Life has been crazy hectic for us.  Last weekend, my mother (who is 86) fell and broke her hip. We made a rushed trip up to check on her as did most of my brothers and sisters. It's a 6+ hour drive for me (one way), so we didn't arrive until after she had hip replacement surgery. I'm happy to say she seems to be in great spirits and was up and walking around ...slowly...the day after surgery.  My mother is a fiercely independent lady and I'm sure she'll work diligently to get her mobility back as soon as possible so that she can return home.

Today, I'm sharing a layout that I created for a challenge that I was doing with a couple of my scrapping friends.  We've all met and spent time together scrapping, but since we live so far from each other, occasionally we opt to have a cyber challenge.  

For this challenge, we used sketch #11 from Sketch Support as our challenge. 


I used some papers from Scribble Scrabble and some rust colored card stock.  The title work was cut with my Silhouette. I've been working hard to learn as much about my Silhouette as possible, and I've figured out some amazing things I can do with it! NOW, I've learned that there's a new Silhouette coming out in October called the Silhouette Cameo that will cut paper 12 inches wide!  This new Cameo is definitely on my wish list!!  Back to the layout.  The photo is of two of my grandchildren, Katie and Adam.  My daughter took this photo several years ago.  I love that she took pictures in black and white...it give is an old feel.  For embellishments, I used some one inch punched circles, 1 1/2 inch scalloped circles, a few blooms and some pearls that I colored with my Copic markers.  I used some faux stitching to frame the photo. This is a super simple layout, but I do love how it turned out.

Hopefully, I'll be able to return to some of my challenges in the next week, but the way things are going, I might just miss a few...but no worries...I will  be back! 

Thanks so much for stopping by! I appreciate your fabulous comments! Until next time...

♥ Hugs! ♥


Pin It!

LinkWithin

Related Posts with Thumbnails