Friday, May 9, 2014

Watercolor Card Class...practice, practice, practice...

Warning...Warning....This post covers the first 5 days of class and is photo heavy! I have learned quite a bit, but I think the biggest lesson I've learned is that I'll never be very good at water coloring.  I'm too much a perfectionist to let thing "bleed" into each other!  I keep trying to get the colors to "line up"...which is totally NOT what I'm suppose to be doing! Anyway...off to my cards.  

This first card was made using techniques shown by Kristina Werner on Day 1.  I heat embossed the stamped image...but for some reason my embossing powder didn't seem to want to melt on the watercolor paper.  Then when I tried to "smush" the colors together, I got some muddy looking areas! I finally had to call it quits on this method (we won't talk about how much ended up in the trash!). The happy die cut is a Simon Says die.  I tried to heat emboss the word "birthday" but couldn't get good coverage with the white powder. Popped the whole thing up on a deep purple card base and called it good.


For this card, I tried to use a color wash background by coloring with watercolor pencils as we were shown on Day 2...I'm showing you this card...but I'm not really crazy about it!  I had to draw my flower pot with pencils, then tried to blend...that didn't work too well.  The flowers were made by stamping a stem stamp from PTI repeatedly, then added some blooms to some of the stems.  Sentiment is from HA. Popped the water color paper onto some pink card stock then called it finished! I also used some of the distress marker techniques from Day 3 


This card was me trying to stamp and color with distress markers....Pfff~!  This was similar to what I did above...and I still wasn't too crazy about the finished card!  I did, however, finally pull out my TH spritzer gizmo and give it a whirl to add a little color to the background...it's not too bad...but I do need practice!  I think the flowers are a HA stamp.  

The techniques for Day 4....hmmmmm...I finally gave up!  Everything I tried was just to "messy" looking for me.  So..here's a card which was inspired by the logo for the class...


I love the look of this....I just need to learn to "blend" my watercolors a little better!  


This card is just something I was playing around with.  I think I got my blending down a little better.  Funny thing is...I did this water coloring on a piece of plain card stock that I found in my scrap box. I had dry embossed it with a hexagon die at some time to use and then didn't use it, so I thought I'd see what water color would do to plain card stock.  It bucked and buckled like you wouldn't believe...but I zapped it with my heat tool after it was completely dry and it mostly flattened out.  The word "thanks" is a die from Simon Says. I cut it out 4 times and glued the layers together.  Then added a bit of sparkly with my wink of stella pen.  The stamped part of the sentiment is from a VERY old stamp set...no idea who makes it.  I added a few sequins and some pearls and popped the water colored piece on to a dark blue card base.  Kinda like how this one turned out.

Finally...you've seen just a few of the cards I kept...but oh so many went into the trash!!  On to my
FAVORITE!


This card was a technique shown by Shari Carroll...and I LOVE how this turned out. I heat embossed a partial background, then colored the shapes with my distress markers and added water....WA-LA....LOVE it!!  I popped it up on a dark orange card base and added a banner.  The "happy" is the same die cut I used in the above card, only I cut the top layer for this one from a teal card stock (even though you can't really tell that in this photo!).  The 'birthday' was from a PTI set.

WHEW!...That's a lot of cards, isn't it?  Which is your favorite...and why?  

Thanks so much for stopping by! Your comments and your visits are always appreciated!! Until next time...
Photobucket


Pin It!

Tuesday, April 29, 2014

LIM 169 and a little scrapbooking...

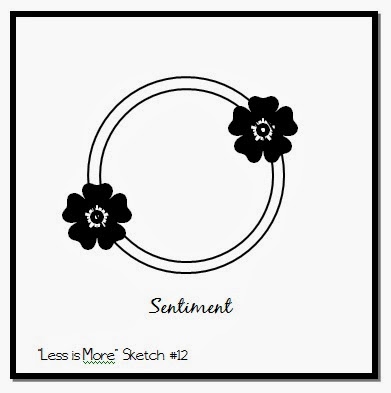
This week's challenge at Less is More is to create a card using the following sketch:


I didn't use a circle....but I think you can see the sketch in my card...


I used a linen card stock for my card.  I cut a square from a 4 x 5.25 panel and embossed the frame using a Spellbinder die.  The flowers are a die from Simon Says.  I cut the flowers from white card stock, then colored them with Copics.  For the background, I sponged a piece of the linen card stock with DI - salty ocean and mowed grass.  I adhered the flowers to the back of the front panel and then pop dotted the panel over the sponged background.  As a finishing touch, I punched the butterfly with a MS punch, colored it with Copics to match the blooms...added a few small pearls for the body and adhered it to the card front. The sentiment is stamped with HA Orange Soda using a stamp from HA.

I haven't shared any of my scrapbooking in a while, so I thought I'd start sharing a few layouts at the time.  I did this layout quite a while back, so I don't really remember much about the papers I used.


The little happy face people were cut using a Silhouette file.  I added color to them in the Silhouette program then used the print and cut feature of the program to cut them out.  The title work was made in the Silhouette program also.  I cut out 4 layers of the words, then glued them all together for a chipboard effect.  The little dragonfly was also a Silhouette cut file.  These are old photos of my children when they were quite young.  I believe my oldest was about 4 1/2 years old, my middle daughter was about 2 1/2 years old, and my son was about 6 months old.  Time has FLOWN by!!! They're all in their 30's now!!

Thanks so much for stopping by! Your comments and your visits are always appreciated!! Until next time...

Photobucket


Pin It!

Monday, April 21, 2014

Box Card & LIM 168

I've noticed quite a few "box" cards recently and I was intrigued, so I thought I'd give it a try.  I made one the other day for one of my granddaughters, and forgot to take a photo.  I have another granddaughter with a birthday on Sunday, so I made this one for her.


I used some American Crafts papers to decorate the pink box.  The fifteen was cut with some Quikutz dies. I cut the little 3-D bow with the Cameo.  The balloons were all stamped with a Simon Says stamp and cut out by hand...(I think I should have ordered the die that goes with these dies!)  I attached the balloons to thin strips of acetate and adhered them to the inside of the box.  Each of the balloons were painted with my wink of Stella clear glitter pen.  The "happy birthday" tag in the back was stamped then hand cut and adhered to the back of the box.  The back flap of the box does not fold down and I added a piece of plain white card stock to the back of that panel to stamp a sentiment...and I also included a little pocket on the bottom of that panel to slip a little money into.


Here's another view that you can see the shimmer on the balloons a little better.  I think this makes a really cute card and I'll probably make another one soon! If you're looking for a tutorial to make this box there's a really good one at Splitcoaststampers.

I made another card that works for the Less is More challenge this week   The theme this week is Makes me smile! It's simply that... something that makes you smile.  Well, no matter how often I use this adorable Penny Black stamp...it never fails to make me smile.  


I used a piece of sunny yellow for the card base.  I die cut an oval and adhered a white panel behind the oval.  I stamped the frog in the center of the oval, and colored him with Copics.  It's difficult to see here, but I also added some glitter with the wink of Stella clear glitter brush.  The sentiment was computer generated...and it's slightly off-center...but it's done now!  I used the font - problem secretary...which is also a bit of a "wobbly" font.  I cut an oval frame slightly larger than the oval center and adhered it to the top of the oval.  I also added glitter brush to the frame.  I rounded the bottom corners with a 3/8 inch corner rounder.

Thanks so much for stopping by! Your comments and your visits are always appreciated!! Until next time...
Photobucket


Pin It!

Friday, March 21, 2014

CTS#69 and Online Card Class

I've been making a few cards this week...so be prepared for a loooooong post!

This first one is for the CAS(E) This Sketch #69 challenge.  Here's the sketch...


And here's my card (I really was true to the sketch!)  :)


I also used some of the partial embossing techniques from Online Card Class - Clean and Simple 3.  I embossed the dots leaving a small 1 inch space in the middle for the sentiment.  The sentiment is from PTI and is stamped in black.  I layered the flourishes (I cut three of each) and adhered them with glossy accents. I added a small pink border, then adhered two small pink pearls.  Done....

Now for a few more cards I've created this week...some using techniques from the card class and some just for fun.


 This is a one layer birthday card created using techniques from the CAS card class...I LOVE how it turned out!


This is another one layer card created just for fun....


I think I made this card for one of the LIM challenges, but never got it posted.  I seem to have trouble getting my photographs done lately...nothing wrong with my camera...I'm just lazy!


This last card is one I made for one of my grandsons.  I used the robot silhouette cut file that I designed and popped him over a background that I sponged ink over a gear template. Turned out kinda cool...hope he likes it!  If you'd like to have this file, just click on the link and download.

Thanks so much for stopping by! Your comments and your visits are always appreciated!! Until next time...
Photobucket


Pin It!

Wednesday, March 5, 2014

CASology 85 & Addicted to CAS 33

I needed a couple of cards this week and after I finished them, I realized that they fit the challenges at CASology and Addicted to CAS.  The challenge this week at CASology is to make a card using the cue word carnival.

Here's my take on this cue word:


The carousel horse is a stamp from Flourishes.  I cut the shape out with my Cameo, then stamped the image and colored it with Copics.  I made the "base" on the Cameo, then die cut some stars to add to it. The banner was also cut with the Cameo and the sentiment is in the same stamp set as the horse.  I added a pearl at the top of the pole...and then added lots of glitter with the wink of stella pen.  I layered the horse on a white piece that was embossed with a PTI embossing mat.  The horse is slightly pop dotted on the panel and the panel is popped up off the card base.  

The cue word for Addicted to CAS is:

Here's my card for the challenge:


I have no idea why the crib looks yellowed (grrrrr... it's actually a nice bright white!) The crib die is a new one and I'm not too sure I like it.  The die itself is pink and it seems to rub off on the paper when you cut with it.  I had to run it through the Cuttlebug several times before it would cut too...plus add some shims. So, I'm not too sure I would recommend it.  It's pretty, but difficult to work with. The crib "bonnet" cut just fine.  I added a few pearls and a flowers, popped it on an embossed background and popped it up on a card base.  The most difficult part was cutting the crib and photographing the card.

Thanks so much for stopping by! Your comments and your visits are always appreciated!! Until next time...
Photobucket


Pin It!

Tuesday, February 25, 2014

A Little Zen....tangle

Having surgery on my left hand has left me with few options for things that keep me busy.  I can ,however, do a little drawing (zentangle) because I am right handed, so I thought I'd share a little drawing that I recently finished.  The finished piece is about 5 inches tall and 11 inches long.

One of my nieces recently had a little girl and I made this for my great-niece.


I figured out my design in my Silhouette program and figured out where I needed to print her name and date of birth, then printed the information on a piece of 9x12 Bristol board.  I used my Silhouette Cameo to cut out the letters, then I traced them onto some Bristol board and added my tangles. I shaded my tangles with a pencil.  For a little pop of color, I die cut a heart about 4 times, then glued the layers together.  I colored the top heart with a red Copic, added a little clear wink of stella and then topped it off with some glossy accents.

I will be having this framed before I send it to her.

I still need to make a card...and I'm working on it, it's just a little slow without full use of both of my hands!

Thanks so much for stopping by! Your comments and your visits are always appreciated!! Until next time...
Photobucket


Pin It!

Monday, February 17, 2014

Where Have I Been...You Ask? (And a FREE Silhouette Cut File!)

Once again I've been missing for a while....here's the reason why....


Early in January, I had a procedure on my left thumb called Zancolli Arthroplasty.  The procedure basically removes some disintegrated bone from between my thumb bones and my wrist bone and replaces the joint by moving one of the tendons in my wrist/hand between my thumb bones and my wrist bone so that I no longer have the pain of bone on bone when using my thumb.  OUCH!


It's been almost 6 weeks now and this is how my incision is looking....not bad.  I still have to complete some occupational therapy to regain the motion and strength in my thumb, hand, and wrist, but at least the worse part is over with! I had this same procedure on my right thumb four years ago and the time frame for complete mobility and healing is about 9 months!

Since my crafting has been restricted to what I can do with my right hand, I've been doing a little designing in my Silhouette program and I wanted to share it with everyone.  These cute little guys can be cut and pieced together or you can do what I did and make them into a print and cut by turning off the cut lines from areas that you just want to print.


These guys are about 4 inches tall, but it you group the pieces together for each robot, you will be able to re-size them to whatever size you want!

Get your free cut file here.  I've uploaded the file to my google docs, so I hope this works right! I haven't added any of my cut files before, but it this works and you want to see more, just let me know! I'm always happy to share.

Thanks so much for stopping by! Your comments and your visits are always appreciated!! Until next time...
Photobucket


Pin It!

Monday, December 16, 2013

WOW! It's Been a While! - MERRY CHRISTMAS!

WOW! I didn't realize how long it's been since I've posted!  For the past two or three months I have been totally occupied with my granddaughter's wedding preparations.  I made the invitations, the RSVP cards, the wedding programs, made her veil, attended several showers, rehearsal dinner, tied garland for decorations, decorated the reception hall, altered her dress slightly...WHEW!  The wedding was on the 14th, so now I can relax a bit.

During the mist of all of the wedding preparations, I was also making Christmas presents for all my children and grandchildren. I dusted off my sewing machine and made some aprons for my daughters and daughter-in-laws, and made big blankets for each of the grandchildren.  I've also made a few scrapbook albums for several of the children.  Time has flown by...each day gets a little easier...but the holidays are bringing back lots of memories of Christmas' past.  I've shed a lot of tears, but also had some smiles as I remember the good times.

I've made a few cards in the mist of all this activity too that I thought I'd share with you.  I think I might have actually made them for a challenge but didn't have time to get them posted.


I figured I can always use a thank you card at Christmas.  I cut the letters out with the Cameo.  The leaves are cut with a die from Quikutz (very old die).  I colored the area behind the letters with some green and red Copics, then topped it with a bit of glitter using a glitter pen.  I pop dotted the letter panel over the colored area and added some red berries with red stickles.


This card was fun to make.  We rarely get snow in Florida, so I enjoy making snow cards.  I used a Memory Box window die and backed it with a piece of acetate.  I used the Memory Box country landscape die for the scene behind the window.  The top layer of the scene is pop dotted.  I sponged the sky (masking out the moon) with DI - tumbled glass - then added some small white dots for stars.  As a finishing touch, I added some stickles to the window panes on the outside of the window to give it a frosty look.  The sentiment was heat embossed with silver EP.  I believe the sentiment is from PTI.

This last card was made for one of the Less is More challenges, but didn't get posted.  I stamped the image and sentiment with Versamark, then heat embossed it with gold EP. For the topper on the ornament, I stamped the image in Versamark on gold foil paper.  I trimmed all the images and pop dotted them on a solid blue background (I also stamped the bauble on a piece of the blue).  I pop dotted the ornament on a piece of the blue card stock cut to 4 x 5.25 and added a string and bow.  I used a gold leafing pen to added just a tiny gold edge to the 4 x 5.25 layer, then pop dotted that layer onto a blue base.  I love how this one turned out.  Them images are from a free set that came in a magazine (I believe they might be Spellbinder stamps?)

Now, I must get busy and get all these Christmas gifts wrapped...got lots to do and now much time to do it.  We have lots of birthday celebrations this week.  My grandson, Jacob has a birthday tomorrow, my daughter in law on Wednesday, another grandson on Saturday, and then my birthday on Monday.  Busy, busy!

I do appreciate your faithfulness in visiting my blog.  I'm trying hard to get myself together and move on...your continued prayers are appreciated!

Hugs to each and every one of you...and may you have a blessed Christmas and a very Happy New Year!

(Hopefully, I will get it together enough to get my post done for my blogiversary.  I have a little prize that I would love to give to someone!  Stay tuned....)

Thanks so much for stopping by! Your comments and your visits are always appreciated!! Until next time...

Photobucket


Pin It!

Thursday, October 10, 2013

It's Been a While....

I know it's been a while since I last posted.  Thank you for all your visits and the sweet comments you have left for me.  I'm crafting a little more now, but I still struggle with my crafting.  I haven't participated in the Less is More challenge in quite a while, but the theme of this week's challenge caught my eye, so I thought I'd give it a try.  

This is the first card I made for the challenge:  


I designed the "peace" frame in my Silhouette program and then cut it out with my Cameo.  I used a Memory Box die for the house and trees on the hill and then cut a reverse hill with an xacto knife.  I coated both "hills" with glamour dust for a lot of sparkle.  The background was embossed with the "snow" embossing folder.  I don't think it's available anymore.  The star is a Memory Box die that I cut out 4 times and glued together for added dimension.  The frame and the "hills" are on pop dots to give it a little dimension.  After I finished it, I thought perhaps it might not be CAS enough, so I made one more.


For this second card I used my Cameo to cut out two of the ornaments in white card stock, then glued the two layers together over a piece of fishing line to suspend it in the frame.  The background is again the snow embossing folder.  I cut the frame with the Cameo and put it on pop dots so that the ornament is suspended over the snow background.  The sentiment is from PTI and was stamped in silver.  I just cut a notch in each end of the sentiment strip and added it to the card with pop dots.  I coated the ornament with stickles and glamour dust.  It's really "sparkly" in real life!

Thanks so much for stopping by! Your comments and your visits are always appreciated!! Until next time...
Photobucket


Pin It!

Monday, August 26, 2013

Life Moves on....

It seems that life moves on whether I want it to or not.  Each day the sun rises (and then it rains)...and each evening the sun sets and the moon rises.  One foot in front of the other....that's how I get through each day.  I have been working on a couple of "crafty" items that I thought I'd share with you today since it's been over a month since I last posted.  

One of my granddaughters got engaged a week or two ago, and her excitement is bubbling over.  I've agreed to help make the wedding invitations, but I also wanted to make something special for her. Here's what I've made for her:

This is a quote by Sam Keen.  After my husband passed away a few months ago, I was looking through his Bible one day and found a slip of paper that had been torn from a magazine...and this was the quote on the slip of paper. The quote really speaks volumes to me about love. I thought perhaps our granddaughter would appreciate the story behind this quote.

I made this using my Cameo.  I cut out each of the letters 4 times, then layered them on top of each other to get the dimension I wanted.  To place them on the background piece, I printed the layout I wanted for the letters and then printed them with my wide format printer in a very light grey color. Then all I had to do was adhere the stacked letters over the printed card stock.  The hearts (about 30) were cut from an old dictionary, then I stitched down the middle with the sewing machine.  The top layer of the heart has the definition of "love" on it.  I added the red bling heart, and then decided that I wanted to add a small red border around the white piece, so I cut 1/4 inch off each side so that the verse would stay centered and adhered the white to the red card stock.  I placed it in a black shadow box scrapbook frame that is a 12 x 12 inch shadowbox.

I also have a close friend whose daughter is getting married in October, so I wanted to do something special for her too.  I did another like this only using a verse from the Bible. I printed the "1 Corinthians 13: 7-8 on the card stock (in a darker grey color) at the same time I was printing the placement of the letters.


I used a black shadowbox frame for both of these and I think the black really makes the artwork pop.

I hope the recipients don't think these gifts are tacky...I thought they turned out great, but you never know.  I know that each one of these took me hours to complete.  Adhering all those letter together is a very time consuming task!

Thanks so much for stopping by! Your comments and your visits are always appreciated!! Until next time...
Photobucket


Pin It!

LinkWithin

Related Posts with Thumbnails