
I didn't manage to get a card made for last week's challenge at CASology, and the week before I made the card but never got it posted until after the challenge ended! THIS week, I managed to get the card made AND I'm getting it posted in time! Aren't you proud of me?! LOL!
For this week's challenge at CASology, we've been given a cue word that could be interpreted SO many ways!

I thought about making a card and just putting "word" on it...my kids use to say that all the time when they were teenagers...but I might be the only one who knows that. Instead I decided to use a technique I used last week and create a birthday card. With 17 grandchildren...somebody is always having a birthday! Here's my take on this week's challenge:

The technique I used is one that I found here, but I found an even easier way to do this (at least it was easier for me!). I stamped the image I wanted to use on my card base (I could have used a panel, but I wanted it to be simple). I used a stamp set from PTI where the stems are stamped and the the flowers are stamped. I cut my letters out with the Silhouette Cameo and rather than have separate letters, I welded my letters together so that it would be one piece. I cut out 4 of the words "happy" but before I adhered all the layers together, here's what I did. I placed a piece of acetate over the card front that I'd stamped. It was slightly smaller than the card, but covered all of the stamped area. I had taped down the card and the acetate with some eclipse tape (washi tape would work too). It just needs to be some type of tape that won't harm your card stock. After I had my acetate over my card base, I placed the word "Happy" (on top of the acetate using a re-positional adhesive) where I wanted it to be on the card. I have a Fiskars stamping press that I use quite often with my acrylic stamps. The spongy base allows me to move the stamp around until I get it in the right place to stamp. Here's what it looks like:
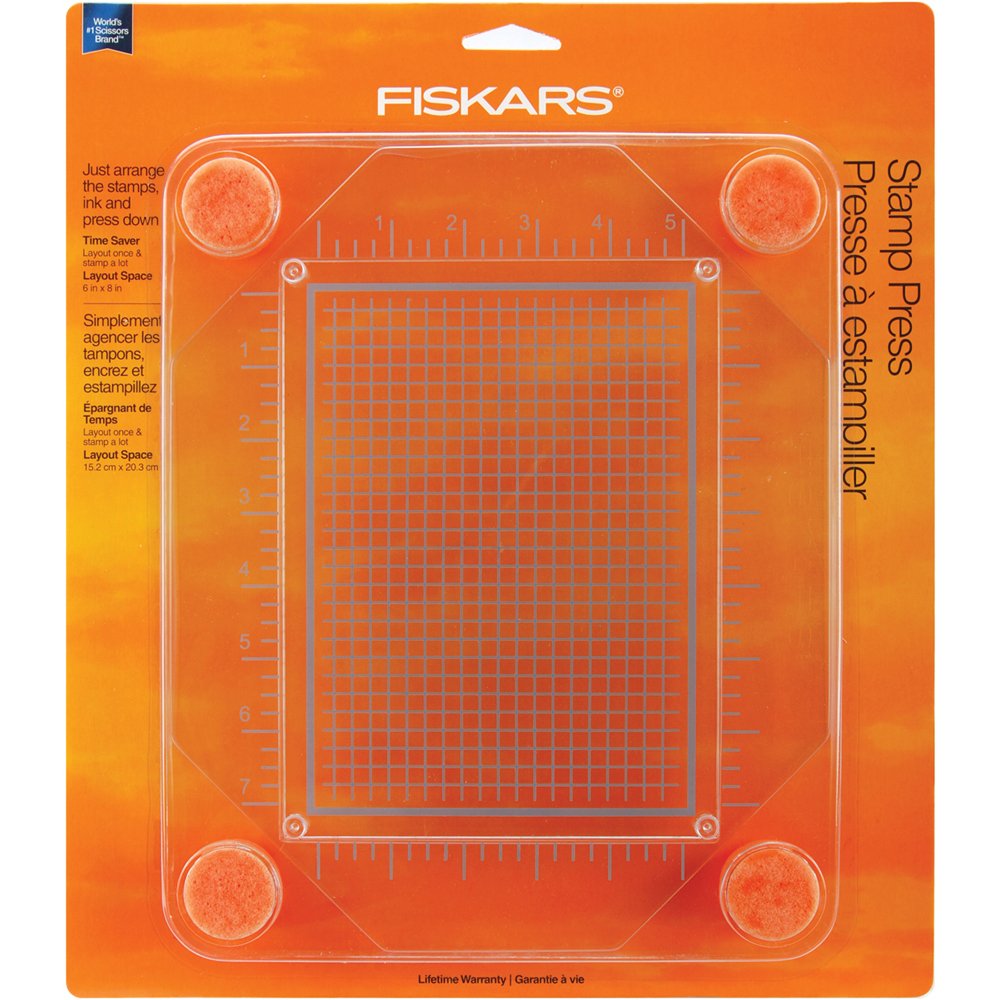 I used this stamp press when stamping on the card base, and when I stamped it again on the letters that I'd adhered to the acetate. Once I'd stamped on the letters, I gently removed them and wiped the excess ink from the acetate. Then I adhered my 4 layers of "Happy" together with some glue (make sure to put the stamped piece on top), and adhered it all to my card base, taking care to line up the stamping on the word "Happy" with the image stamped on the card base.
I know this all sounds complicated, but once you do it a time or two, it really is super simple. I LOVE how easy it was using the acetate!
Thanks so much for stopping by! Your comments and your visits are always appreciated!! Until next time...
Hugs!


14 comments:
Clever! I'm pretty sure the other way would be very difficult with more than one stamp, like you did here. Love this bright happy card! Thanks so much for playing along with us at CASology this week!
This looks fantastic Susan, I love the colours and the stamped word. I want a stamp press so I can stamp acrylic sentiments with more even pressure, but now I have some more reasons to buy one! TFS Cathy x
This is so pretty, so spring like! Love the texture with the word "happy" - and I think I might try your idea!
PS I've got the stamp press too - wish I'd found it ages ago.
Beautiful card :) the bright colors and great design immediately catch the attention :)
Your card is really gorgeous, Susan...it really stands out in the gallery!
Thanks so much for sharing your technique...I think I'll try it now :-)
Love it!! Great colors - so fun and bright. And love how you incorporated the die-cut letters. Thanks for including your directions on how you did this. Loll xx
Great job with JJ's technique, really turned out fabulous. Thank you so much for sharing with us this week at CASology!
I've recently seen this technique as well Susan - it looks so gorgeous. I am going to come back later and read your post in more detail as it's too early for me to take it in (6.30am) - def need a coffee first! Gorgeous card and thanks for the explanation.
Karen x
A beautiful card :) Love that tecnique-but think i'm a little too scared to try !
Nessa xx
Oh this is so beautiful.
luv
Debby
I love this card! A great idea of stampin on the letters and making this 3D effect.
Eva
Totally stunning card x
your card is just beautiful, susan and one of the best takes on that technique! so glad to see you playing along with CASology this week!
This is beautiful! Everything from the technique to the colors and design. Thanks for playing along at CASology this week!
Post a Comment